Devlog 1: Blender-ing?
Learning to Blend
For this week, we were set the task to learn how to use the modelling software 'Blender'.
Blender can be used to create a variety of computer generated assets such as 3D models, animated films, art and more.
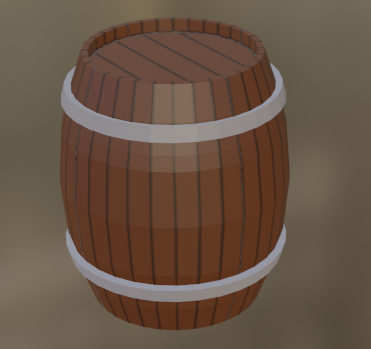
Our first task was to follow an online tutorial to learn the basics of using blender and to create our first 3D asset. A barrel.
Aside from the tutorial using an older version of Blender (with a slightly different user interface), it was pretty straight forward to follow and I didn't encounter any difficulties. We used a combination of techniques and tools including extruding and loop cutting to create the barrel and we were also introduced to the UV Editing and Texture Paint features of Blender to create a basic texture for the barrel. The result of following the online tutorial is as follows:
Blender-ing a Tourist Attraction
With our newfound knowledge of how to use Blender, we were then set the task to model an object that might be found at a specific tourist attraction in Tasmania (excluding stuff like benches and bins unless there was something special about them).
Located in the north-west of Tasmania, there exists a country town called 'Penguin', which is famous for (you guessed it) a GIANT PENGUIN statue. This statue would have met the criteria however I wanted to try to create something with a little bit more detail to it. So I decided to create a 3D model of something located next to the giant penguin. The Penguin Public Book Exchange. What's special about the book exchange is that it is in the shape of (you probably didn't guess it) the TARDIS! (from the British television show DR Who)
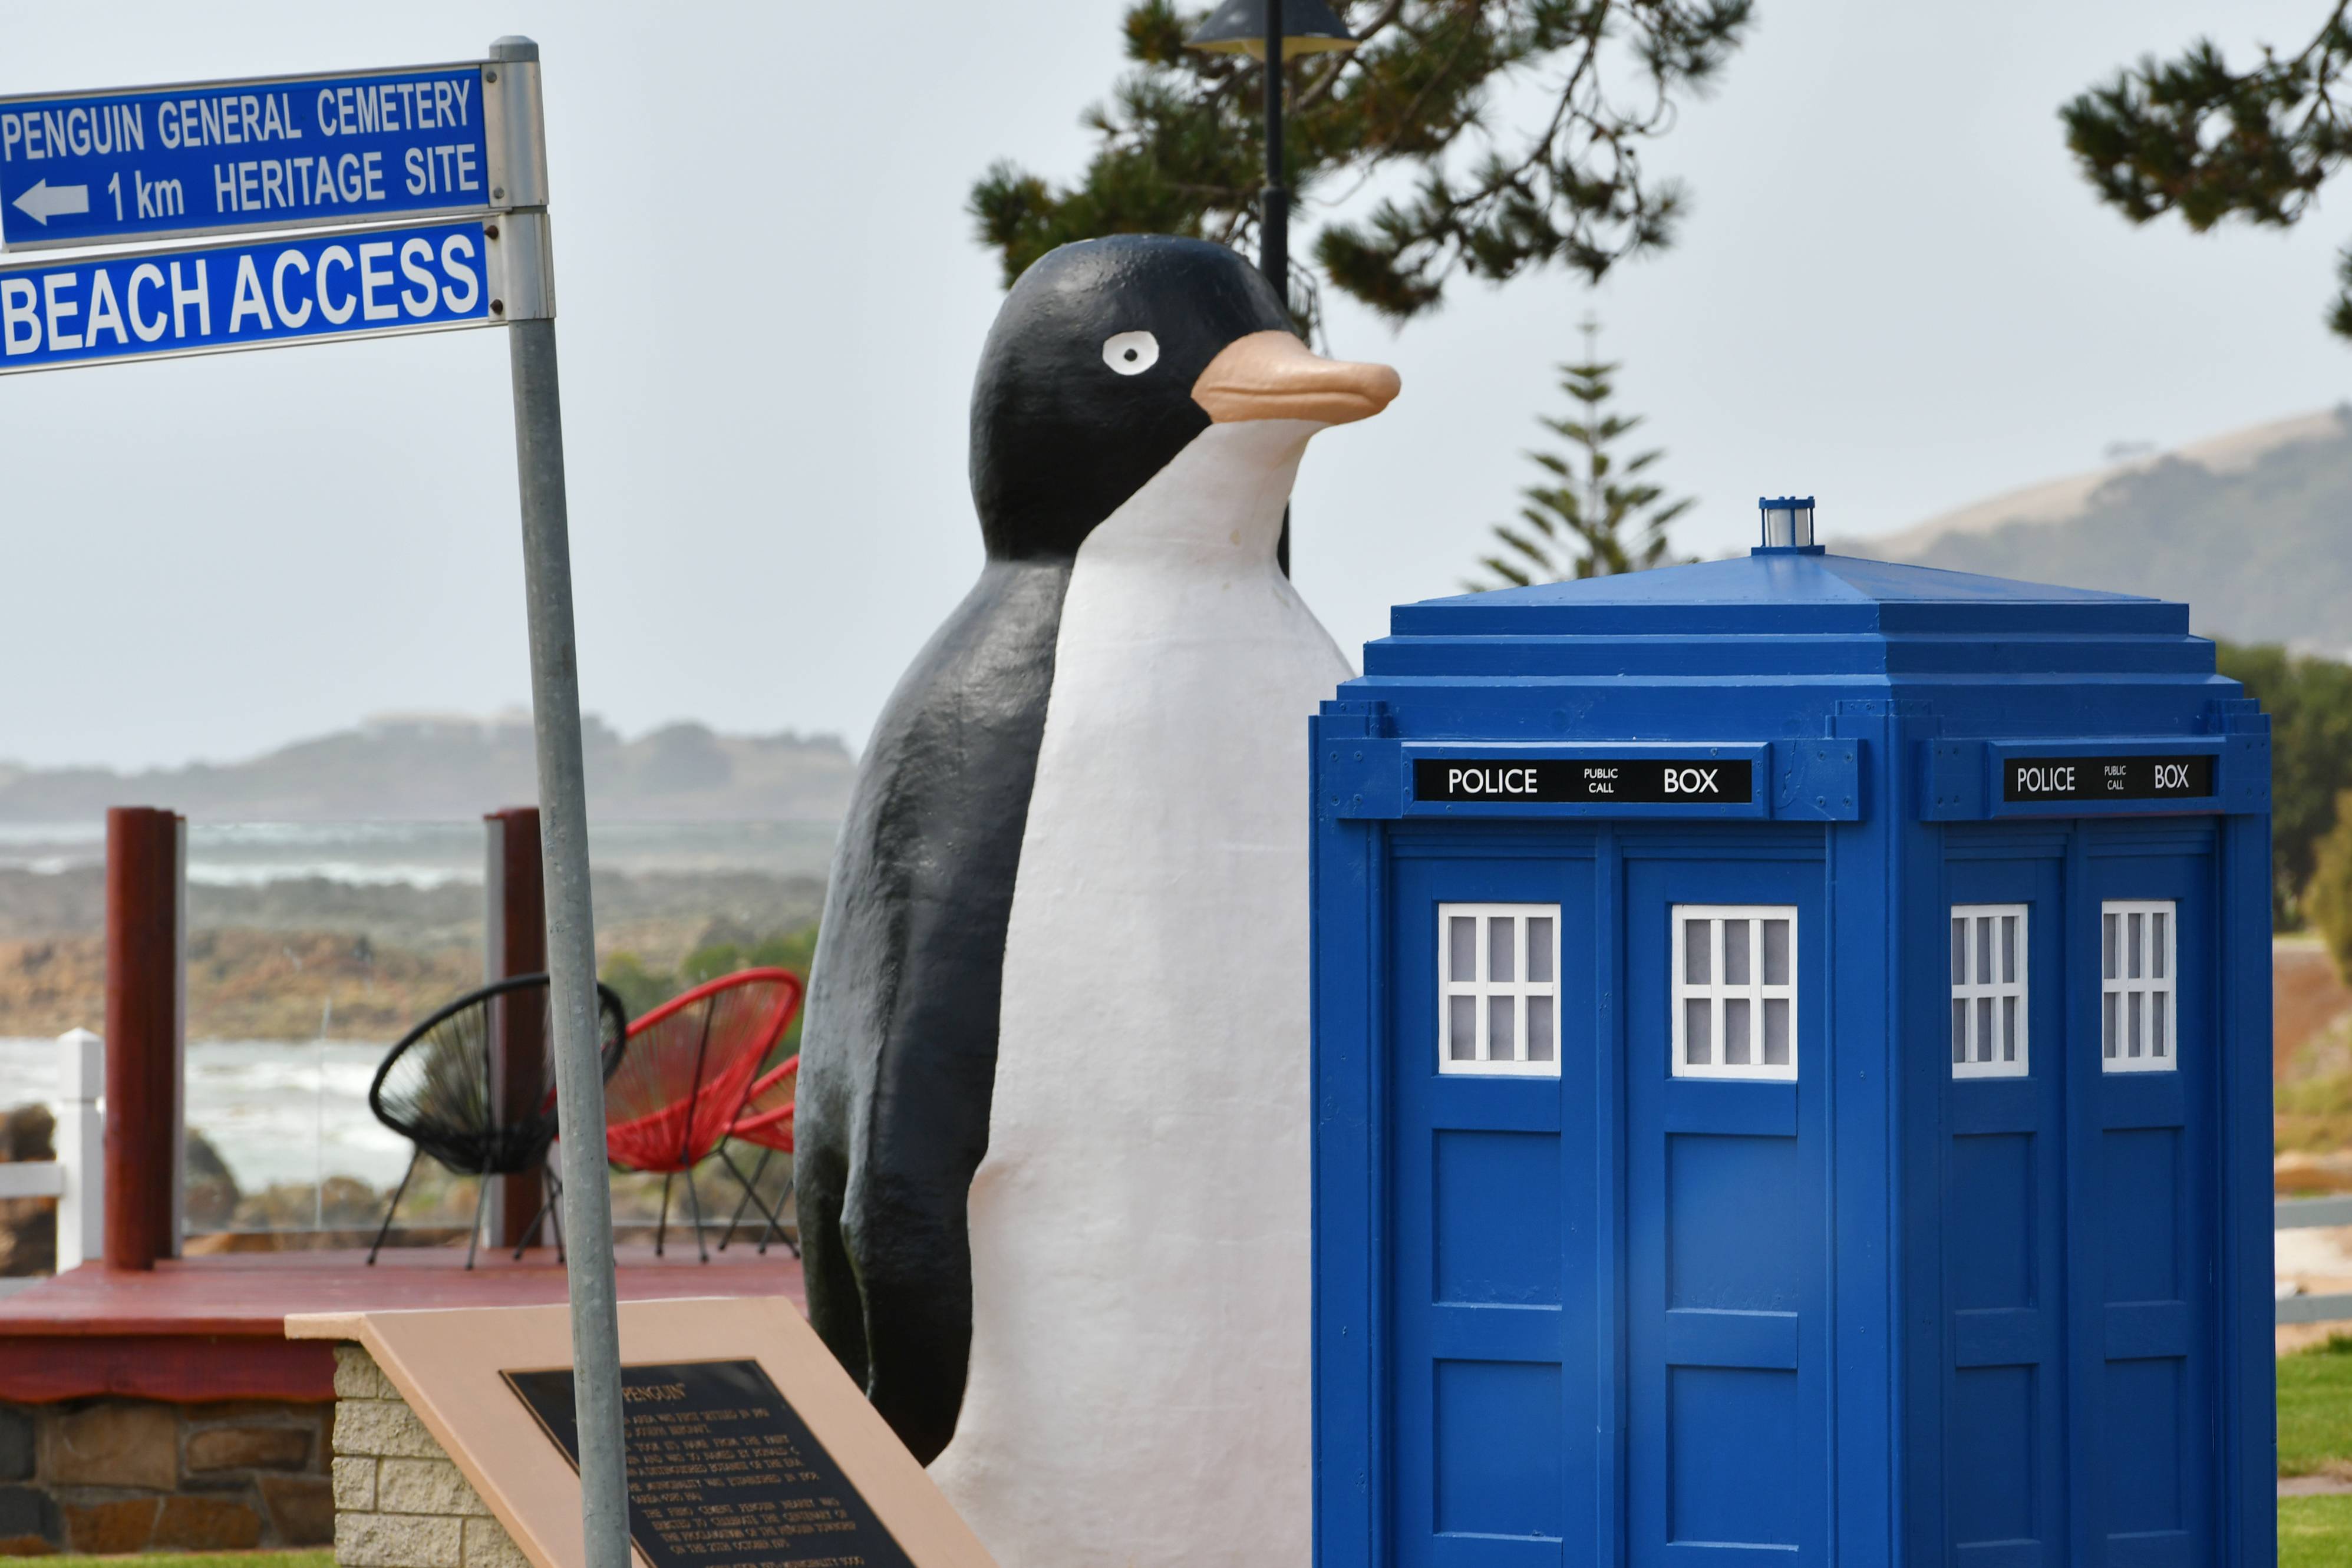
(Image from: https://www.theadvocate.com.au/story/5922036/tardis-book-exchange-appears-in-pen...)
Now, the Tardis may look like a simple box, but it has a number of details to it such as the cuts in the wood, the panels for the windows, the light at the top, the door handle and the nameplate which all required a number of different techniques to create.
To create the 3D model of the book exchange, I started with a cube mesh which I transformed into the basic rectangular prism shape. From here on I used a number of tools such as the extrude, inset and bevel, to create the roof and the base. To create the light on top I created a separate 3D model of the light by transforming a number of cylinder mesh's and 'joining' it to the body of the model. A similar thing was done to create the 4 pillars on the edges of the Tardis and the nameplate. Creating the windows and the indented sections on each side of the Tardis proved to be the first challenge. I had to cut sections out of the walls while keeping the rest of it intact. I tried fiddling around with the loop cut and knife tool but that didn't work. After some research online I found an object modifier called 'Boolean' which is used to cut a shape out of an object by using another object. So all I needed to do was create a cube that was the shape of what I wanted to cut out and use that to create the indents. After working out how to use it correctly, it was only a matter of repeating the process on all four sides. The handle was created by using a flattened cube with sections cut out it to separate it into the top and bottom fittings and an elongated torus to create the handle.
The end product turned out to look quite similar to the Penguin public book exchange.
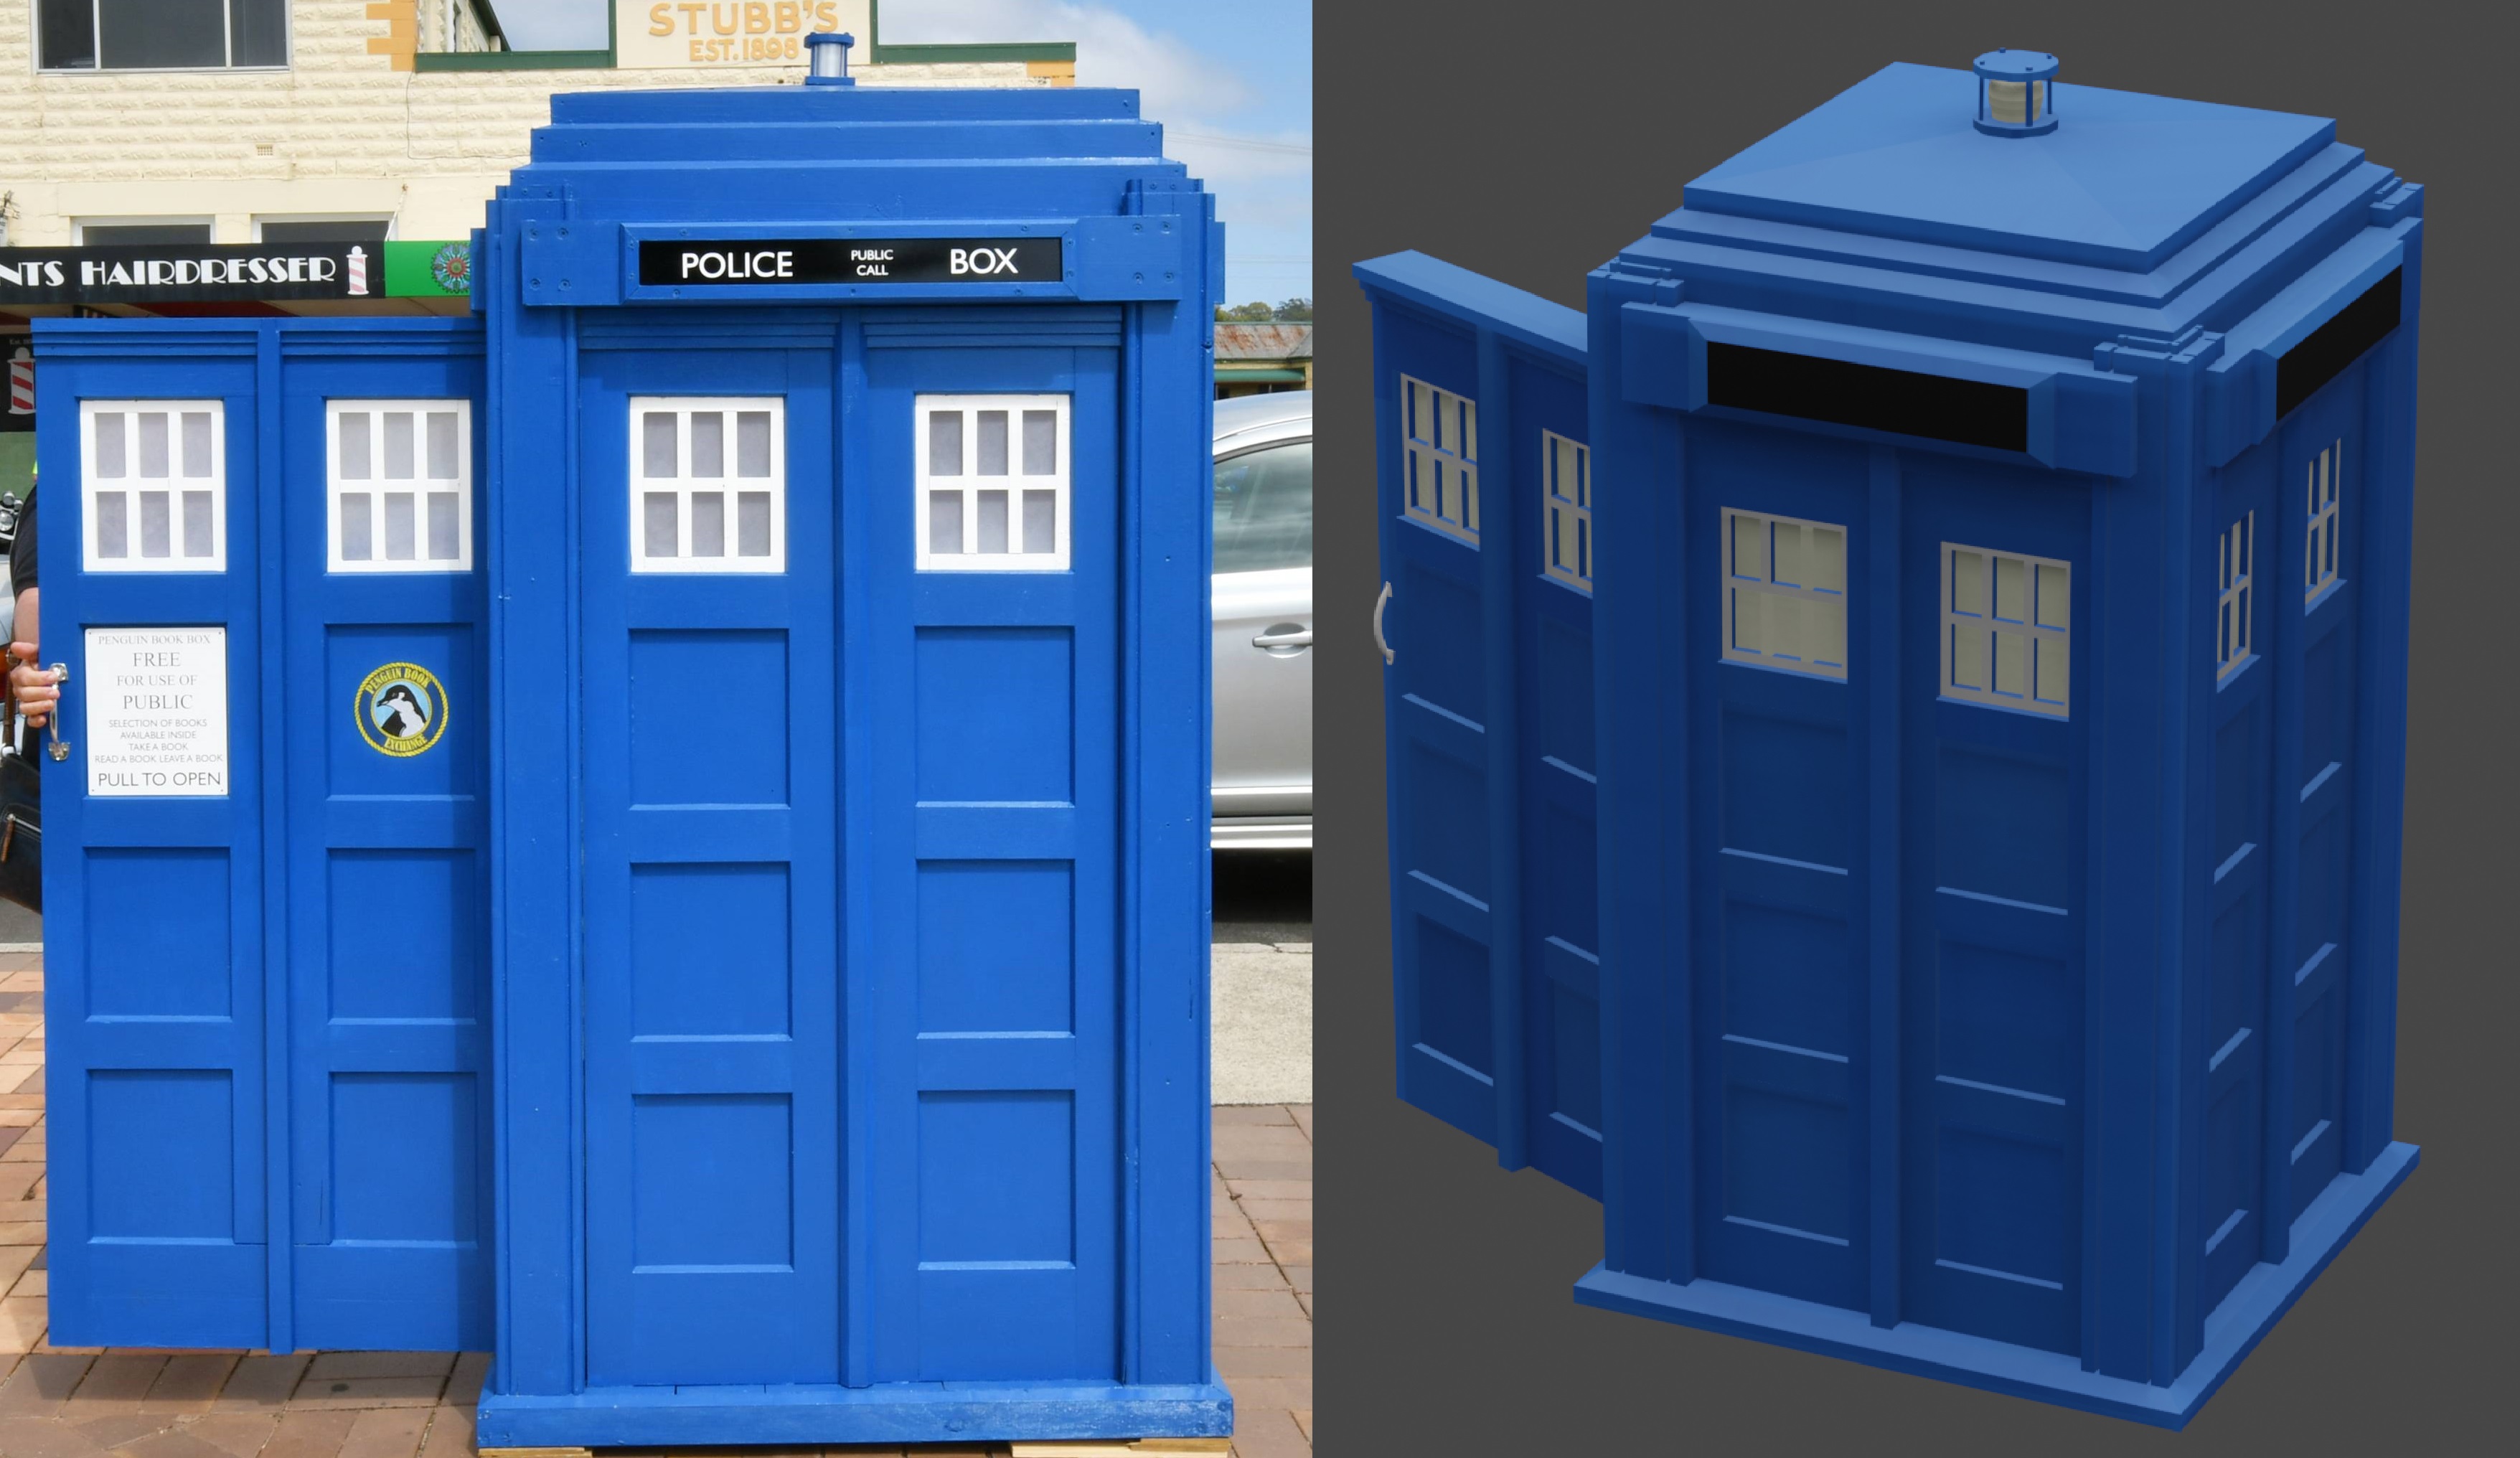
(Comparison & reference image from: https://www.theadvocate.com.au/story/5922036/tardis-book-exchange-appears-in-pen...)
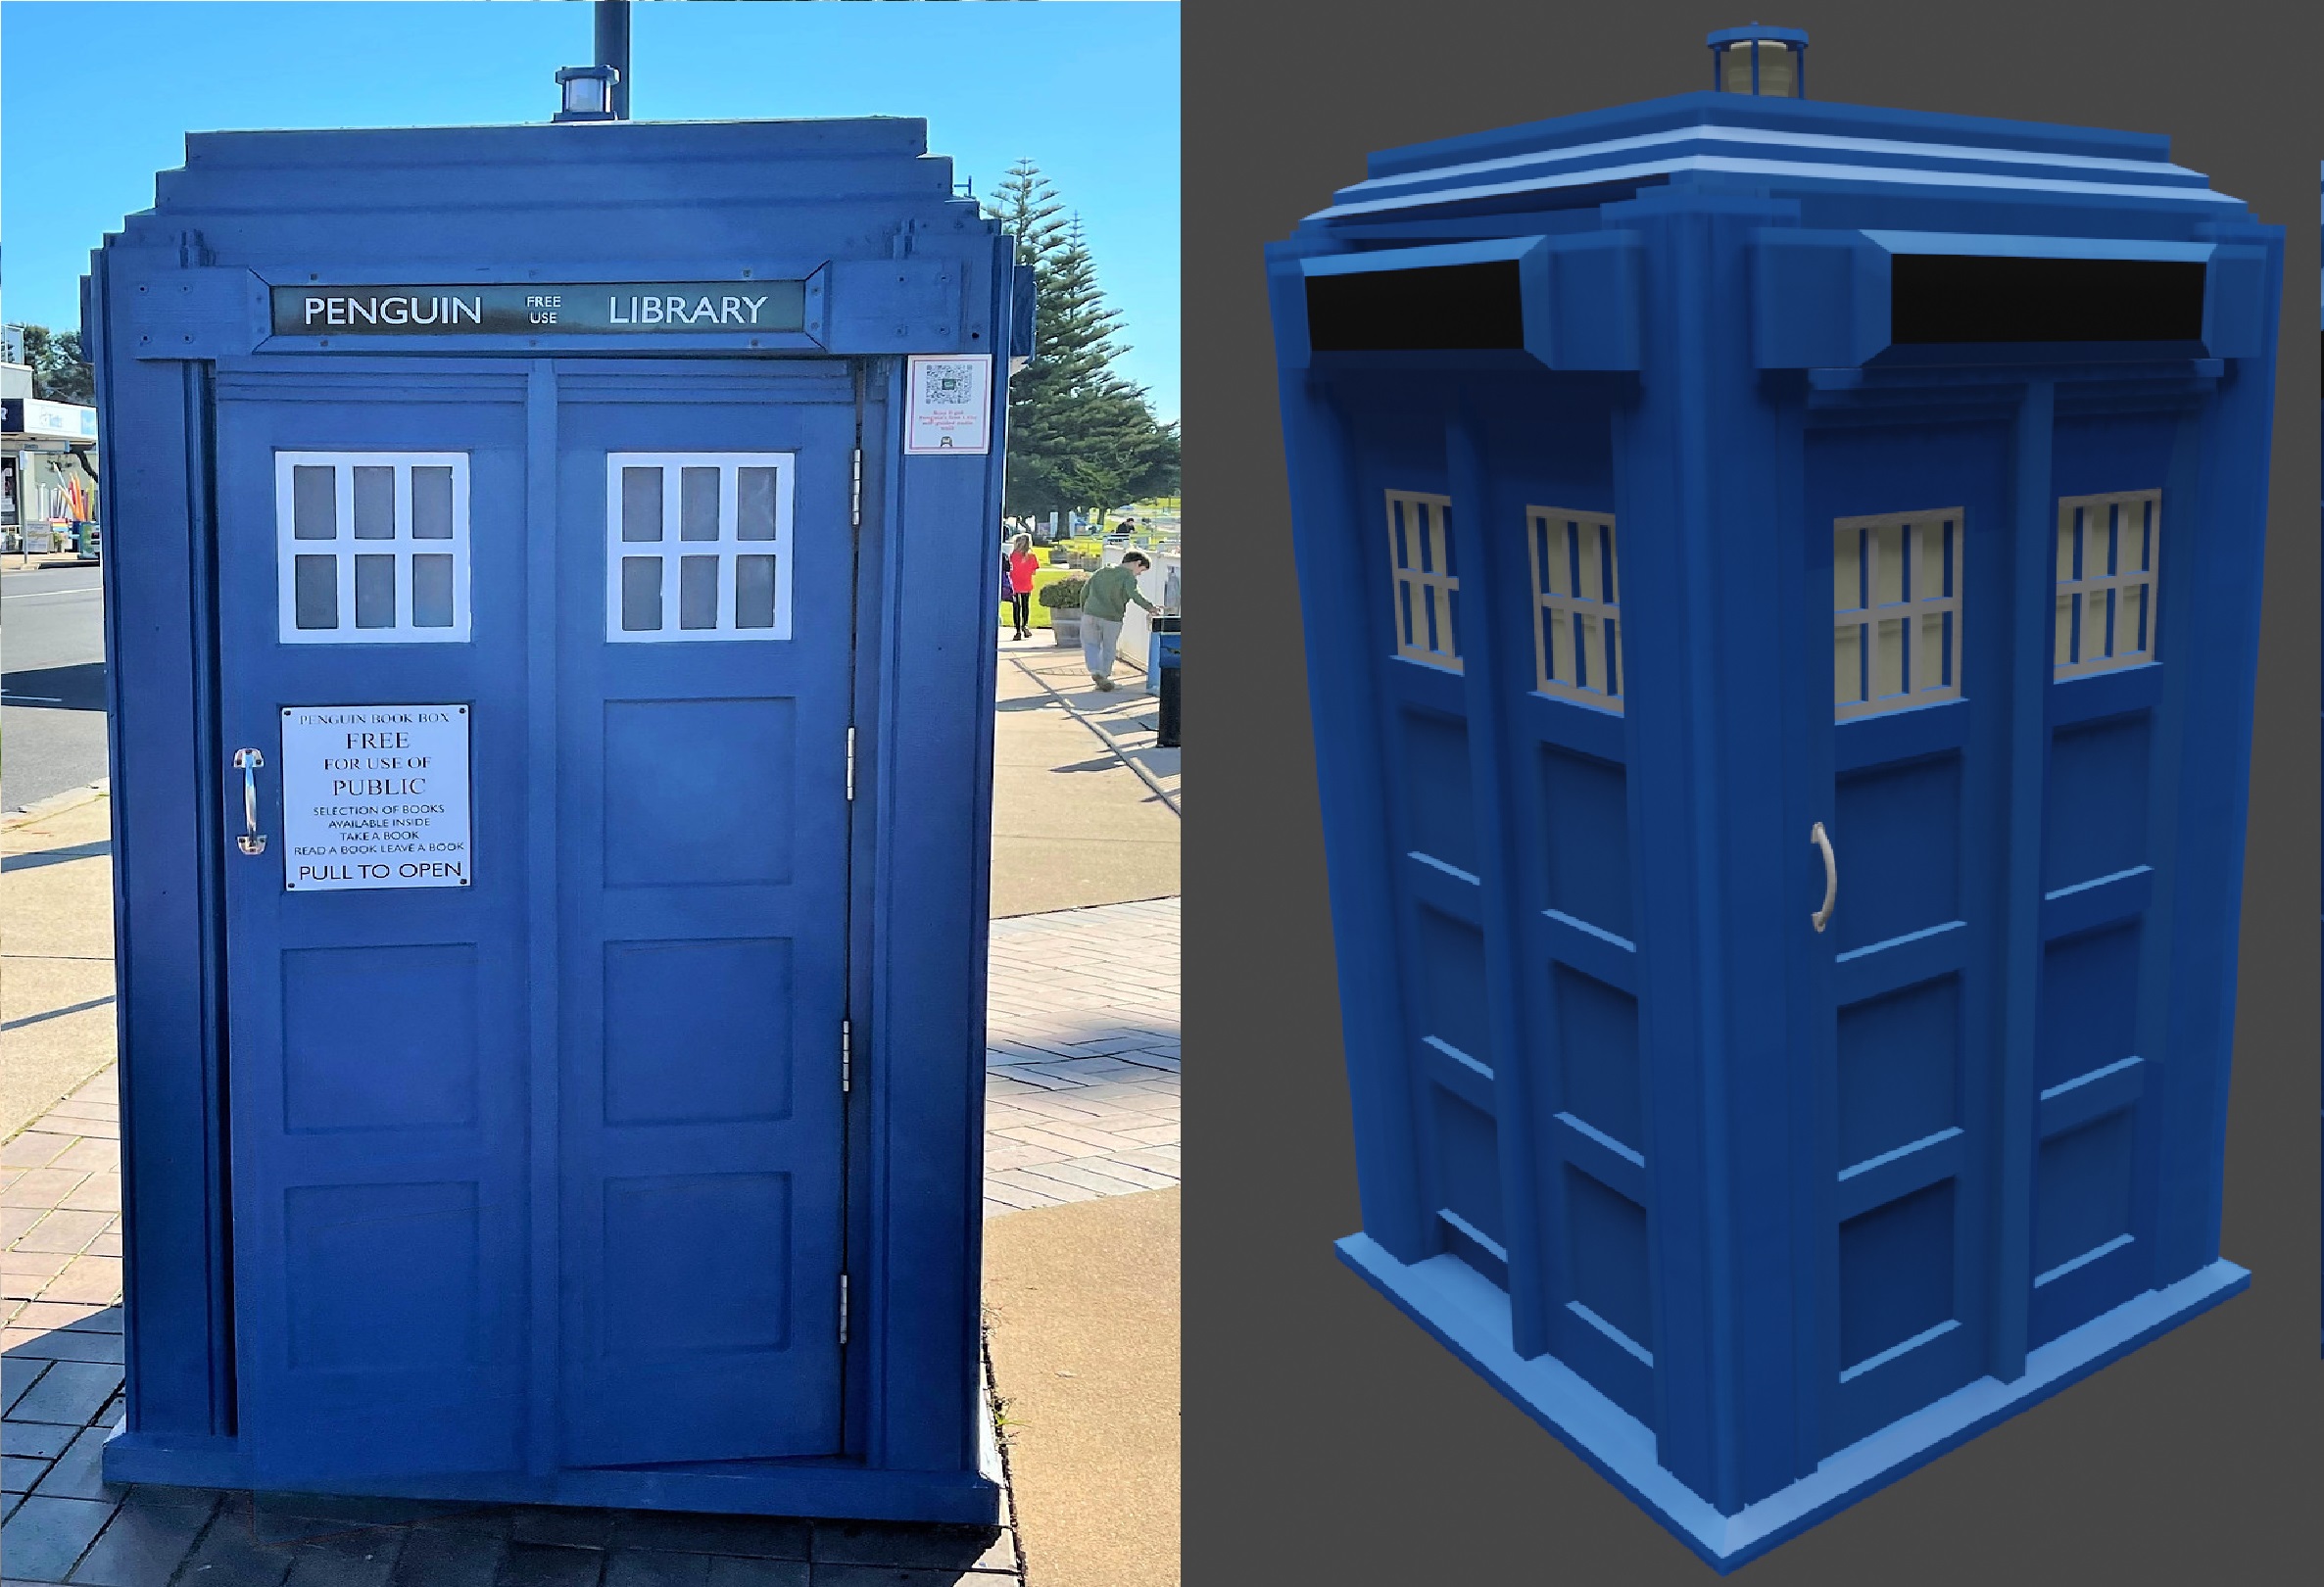
(Comparison image from: https://www.maturesolotraveler.com/post/10-things-to-see-and-do-in-penguin-tasma...)
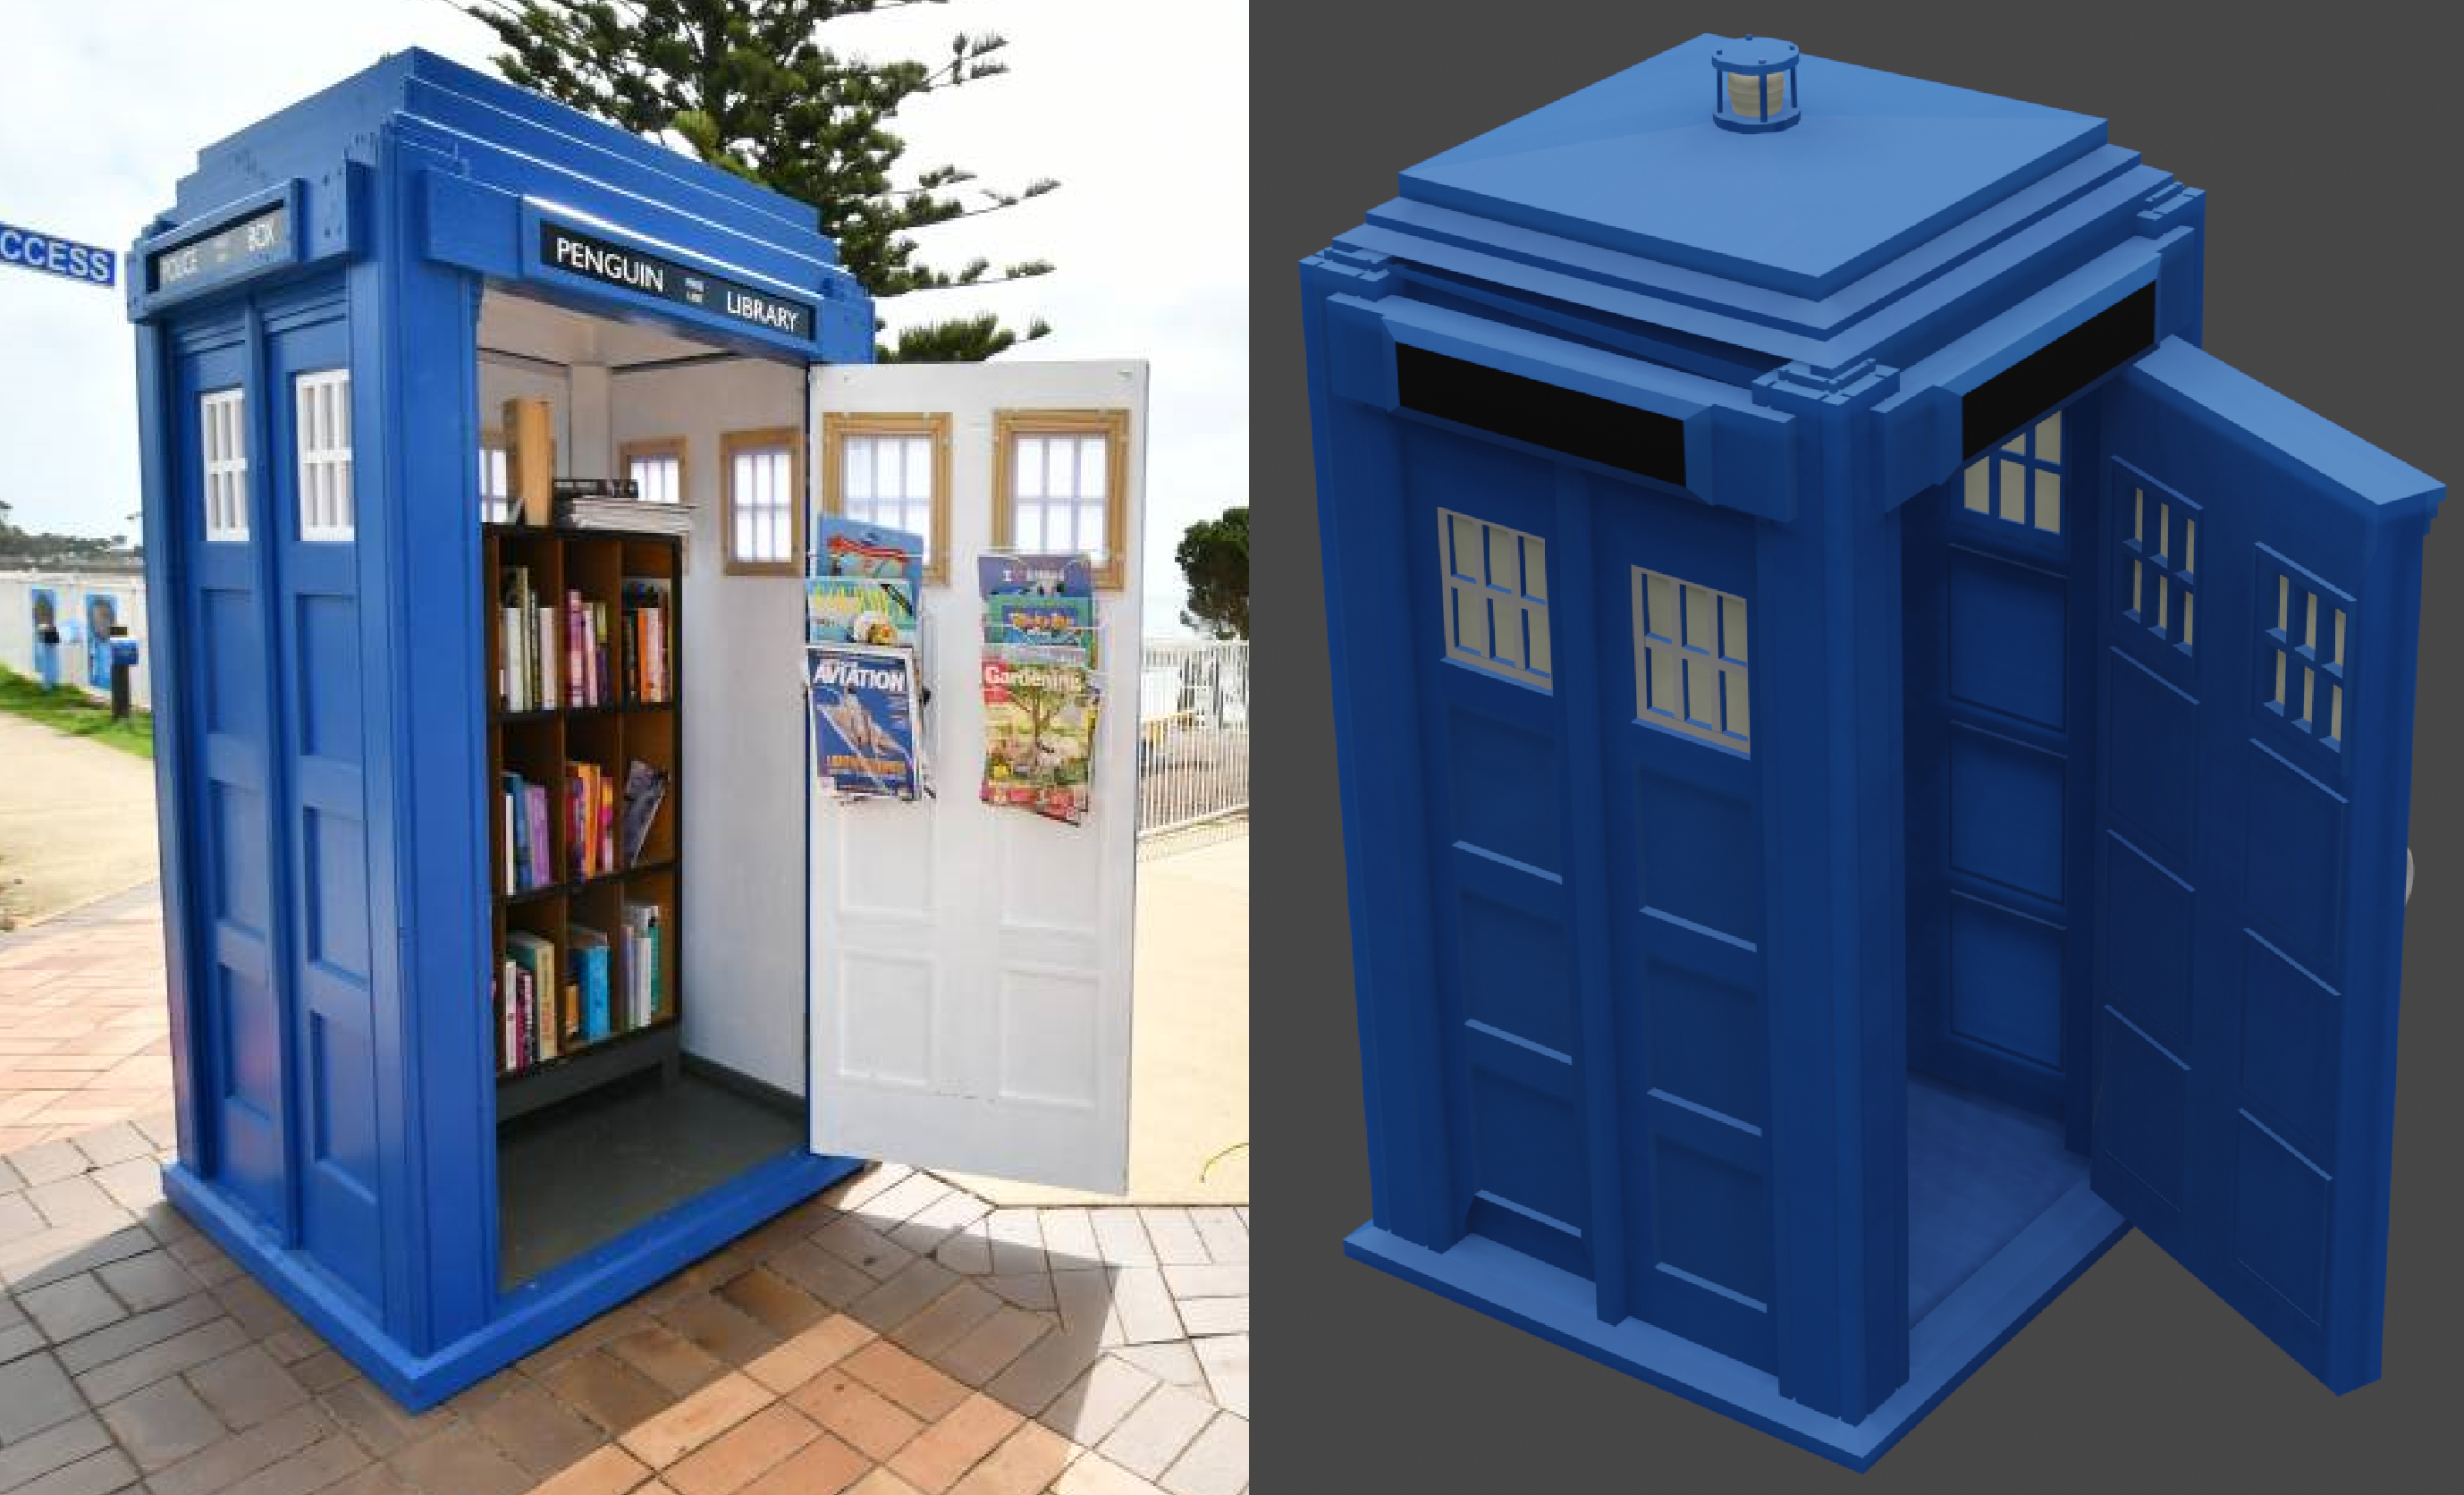
(Comparison and reference image from: https://www.theadvocate.com.au/story/5922036/tardis-book-exchange-appears-in-pen...)
If I had more time I would of liked to add some shelving and different textures to the interior of the book exchange (and maybe some books) and added some text to the nameplates. If I were to reattempt to model the Tardis book exchange again, I would do a few things differently. I ran into some issues to do with the walls being hollow and the use of the 'Boolean modifier' which made it more difficult to get the indents showing than it had to be.
Overall it was a good learning experience and after the initial learning step, I actually enjoyed creating the 3D model. I am satisfied with what I managed to created with the limited amount of time I had.
UTAS KIT207 - Portfolio
A collection of posts as part of KIT207 University Course
More posts
- Devlog 10: Cinemachine and Post ProcessingAug 18, 2022
- Devlog 9: Shadergraphing and LightingAug 16, 2022
- Devlog 8: Game IdeasAug 09, 2022
- Devlog 7: Simple Game [UPDATED]Aug 09, 2022
- Devlog 6: NavigationAug 09, 2022
- Devlog 5: Terrain and ProBuilderAug 02, 2022
- Devlog 4: Unity and Im/Ex-porting AnimationsJul 28, 2022
- Devlog 3: Bone-imationJul 26, 2022
- Devlog 2: ImportingJul 21, 2022
Leave a comment
Log in with itch.io to leave a comment.