Devlog 3: Bone-imation
The task for this devlog was to create a character in Blender, give it some bones and animate it doing different movements.
Character Creation
Our first task was to create a simple humanoid character. The character did not need to be detailed but had to have the basic human form. For this we used the techniques we learned from the previous devlogs as well as a tutorial as a guide. One thing that we learned from the tutorial was the use of the'Auto Mirror' add-on. What this add-on did was ,when applied, it would mirror one side of the axis to the other side (e.g. mirror the left size of the y-axis to the right side). This way, we only needed to create half of the model and the other half would be created automatically. This is good for when you want to make symmetrical models. The model I created is shown below.
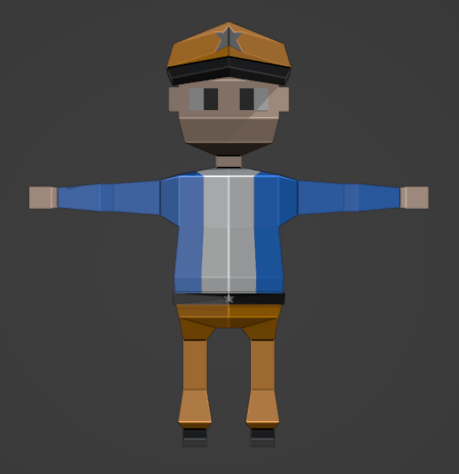
(Humanoid Model [T-Pose])
Soo Many (Or Not Enough) Bones
The next step was to apply the bones, or the rigging, to the model so that we could move it around. The second video in the tutorial series showed us how to set up the bones for our model. To create the bones for our model, we had to add a new 'armature' object to our scene. An armature can be thought of as a collection of bones, or a skeleton. Once we had our armature object and our first bone, we had to position that bone within the model like you would find inside a human body. As we were creating a low-poly model, we didn't need to add all 206 bones like there is in a human skeleton. We only really needed to add the major ones. Our first bone was going to be used for the lower back/pelvis area of our model. This bone was also going to become our 'root' bone or 'parent' bone for all the other bones we were going to create. This means that when this bone in particular was moved, all the other bones would move as well. Once we had the root bone in place, it was only a matter of extruding new bones and positioning them correctly to set up the bone rig. My model ended up having the following bones: pelvis/lower back, middle back, upper back, neck and head, left and right shoulder, left and right bicep, left and right forearm, left and right hand, left and right upper leg, left and right lower leg, left and right foot, left and right heel* and left and right knee*. (* the heel and knee bones weren't really used as part of the skeleton, but rather as a marker for where the knees and feet should point or how they should rotate.) Once again, using special features in Blender, we only needed to create one side of the armature, e.g. the right arm and leg, and we were able to copy them over to the left side. Once we had our armature set up, we had to make it the parent of the humanoid model. After that, rotating or moving one of the bones in the armature would rotate or move the corresponding part of the model.
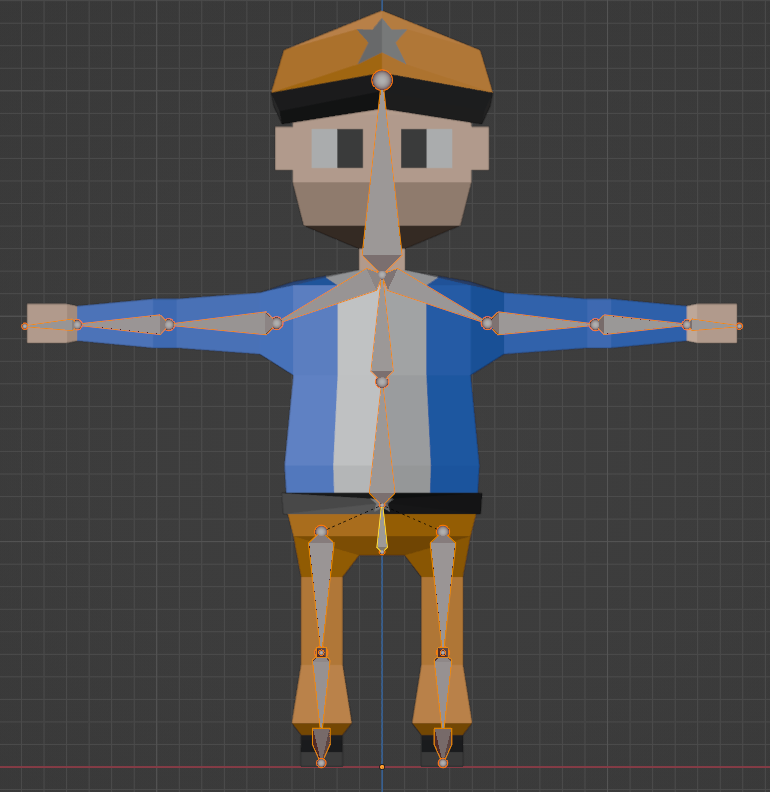
(Humanoid Model with Armature Highlighted)
Animation
Once the armature was complete, we were able to move onto animating the model. We were tasked to create 3 different animations for our model. An idle animation, a walking animation and another animation of our choosing (such as a famous dance from a videogame). The third video in the tutorial series showed us how to create animations. Animations in Blender can be tricky to get right. They are created by using what is called 'Keyframes' and a 'Dope Sheet'. A dope sheet can most easily be thought of as a timeline for the animation. Keyframes are key moments of the animation that are added to specific frames in the dope sheet. For example, for an idle/breathing animation, we would start of with the model in a relaxed standing position. We would then add a keyframe to frame 1 in the dope sheet. The keyframe saves the location, rotation and scale of the model (as well as other properties) so that whenever that particular frame is selected/played, the model would always be in that position. Next we would modify the bones of the model to give the impression of 'breathing in'. We could raise the shoulders, straighten the legs a little, curve the spine backwards a little and move the arms a little. After setting the model to up look like it breathed in, we could select another frame from the dope sheet (e.g. 10) and add another keyframe. Lastly, we would select another later frame such as frame 20, and copy and paste the keyframe from frame 1 to it, so that the model was back to its original position. Now the animation was ready to play. What Blender does is, using the keyframes, it extrapolates what the armatures position should be in between the keyframes and changes the armature to give the look of slowly changing from one keyframe to another. This way you do not need to add every single keyframe manually. Blender can work out what needs to be done to change the model from one pose to another. If you did want more control over how the model moved, if you wanted to add more fine detail to the animation, you would have to add more keyframes in with the specific movement. The following 3 animations used 3, 9, and 8 keyframes respectively.

(Idle/Breathing)
(Walking)
(The Floss)
A handy hint to creating animations using keyframes is to use 'cycles'. A cycle shows different moments of a action, such as walking.
I did have one issue when trying to create multiple animations for the one character. For some reason when I modified the rotation for one animation, it would affect the rotation of another animation, but it didn't affect the 3rd animation at all. After trial and error, I managed to fix the issue by resetting the first keyframe by selecting the 'Location, Rotation & Scale' option from the 'insert keyframe' menu. I still don't know why it only affected one animation and not all of them but a win is a win so ill leave it at that.
Overall I had a fun time animating the humanoid model and I hope I get the chance to animate more models in the future.
Leave a comment
Log in with itch.io to leave a comment.