Devlog 4: Unity and Im/Ex-porting Animations
For this devlog, we were required to import our models and the animations we made previously into Unity and hook them up so that the animations played when certain conditions were met (e.g. a button key press or movement).
Importing
Our first task was to export the model and animations we made in the previous devlog from Blender and import them into Unity. When a model is exported in Blender to an .FBX file, the animations are included as part of the file that is created. This means that you do not need to export the animations separately, they are all in the one file. Once we had a .FBX file, we imported it into Unity like we did before. When the model we imported was selected in the 'Assets' window, a new tab called 'Animation' appears in the 'Inspector' window (in addition to Model, Rig and Materials). From here, we could view and modify some settings related to the models animations as well as view the animations in the preview window. This is where I ran into an issue with how the model or animation was exported. When viewed in Blender, the animations play out perfectly as they were supposed to, however when previewed in Unity, the model didn't animate correctly. The hat that was on my characters head was frozen in position and didn't animate with the rest of the character (see below).
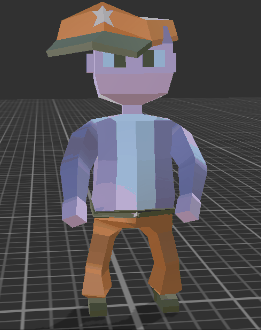
(Floss Animation Not Working Correctly)
After re-attempting to export the model with various different settings, none of which fixed the issue, I turned to the internet for answers. What I found was that Blender doesn't export settings for things called 'Constraints' or 'Inverse Kinematics'. They are more 'Blender specific' options, so even if they were exported, Unity wouldn't necessarily know how to use them in the same way. The issue I has was that the hat was attached to the head bone of the main model by a constraint. What this constraint basically did was allow the hat to be a child of the head bone without it actually being placed under it in the hierarchy. So when the model was imported into Unity, this constraint disappeared and the hat was no longer attached to the main character model. There were a couple of ways to fix this. One of my class mates was having the same issue. They managed to fix it by modifying the model in Blender, joining the hat to the main character then fixing up the animation to make sure it was all working as it should. When I attempted to fix the issue this way, I ran into issues with the animation which meant I would have to remake all the animations again. I didn't really want to do that so I looked for another way to fix it. I thought that if the constraint that attached the hat to the body in Blender disappeared when the model was exported, can I recreate the constraint in Unity somehow. So I tried attaching the hat object to the head bone as a child in Unity (like it was in Blender) and it worked. It fixed the animation. (It seems so obvious now but trying to work out why the problem was occurring took a while)
Unity
Now that I finally had the animations working in Unity properly, it was time to start playing around with them. To get the animations playing in the scene in Unity, we need to add an 'Animator' to the model as well as an 'Animator Controller' . The Animator provides an interface to control the animation system but the Animator Controller allows you control the animation clips and transitions between different animations for an object. The Animator is attached to the object/model and the Animator Controller is attached to the Animator. The Animator Controller is mainly what we will be using to control the characters animations.
The Animator Controller controls which animation is playing by switching between animation states. When an animation controller is created, it initially only has an Entry state, Exit state, and an 'Any' state. None of these states are linked together meaning the animation controller starts and stays in the Entry state. To add new states to the controller, we simply drag the animations that came with the .FBK file onto the Animation Controller screen. Links between states can be created by right clicking on the state you want to change from, selecting 'Make Transition' and selecting the transition state you want to change to. Link are one-directional so if you want a state to change back and forth, you would need to make a transition in each direction. The transition between each of these states can be controlled via parameters that you can add in the Animator Controller window. There are 4 different types of parameters: bool, float, int, trigger, and these parameters can all be modified by using C# scripts. Each parameter is useful in different situations. For example, I used the float parameter to control when the walk animation plays. When the float 'movementspeed' is greater than 1, the walk animation would play, otherwise the idle animation would play. I also used another float 'reverse' to control the 'multiplier' option of the walk animation, which controls the speed the animation plays at. When the 'S' key was pressed, (when the character was walking backwards) the multiplier would have a value of -1 which would make the animation play backwards. When the 'W' key was pressed, the value would be 1 which would play the animation forwards. See below for the forwards and backwards walking animation. I also used a C# script in addition to the 'reverse' parameter to match the speed of the animation so that it would suit the characters movements.

(Walking Animation)
I also used a Bool parameter to control when the Floss animation would play. The parameter would be set to 'true' when spacebar was held down and false when it wasn't which made the floss animation play for as long as the space bar was held down. A trigger parameter wouldn't have worked as well here because a trigger parameter automatically returns back to false after the animation has finished playing. As the Floss was a repeating animation this would cause the animation to start and stop and not be smooth throughout it. The trigger parameter would be good for something like a 'wave' emote that you would only want to play once.
(Floss Animation)

(Idle Animation [character rotation is not a part of the idle animation])
The next step was to write some C# scripts to control our character. I wont get into the details of the scripts but basically what the scripts achieved was when 'W' was pressed, the character would move forward, pressing 'S' would move the character backwards, pressing 'D' would rotate the character clockwise and 'A' would rotate the character anti-clockwise (as well as space making the character floss).
The last task was to add an 'Event' trigger to our scene. Basically this is an event that is triggered when certain conditions are met. The example used below is a door opening (or disappearing) when a player approaches it. What we had do was create an invisible object with a 'Box Collider' attached to it so that it would detect when the player was within its area. After this, we used some C# scripts to deactivate the "door" object when the player entered the Box Collider and triggered the event.

(Character Interacting With An Object)
This devlog was more of a refresher of how to use different parts of Unity for me as I have previously done other courses that had an Unity component to them. I did however learn that several things can go wrong when exporting and importing models with animations. But the important thing is to understand what went wrong so that you know how to avoid it or fix it in the future.
Leave a comment
Log in with itch.io to leave a comment.